
Step-by-step guide from setup to daily operations.
 🔍 Click to zoom
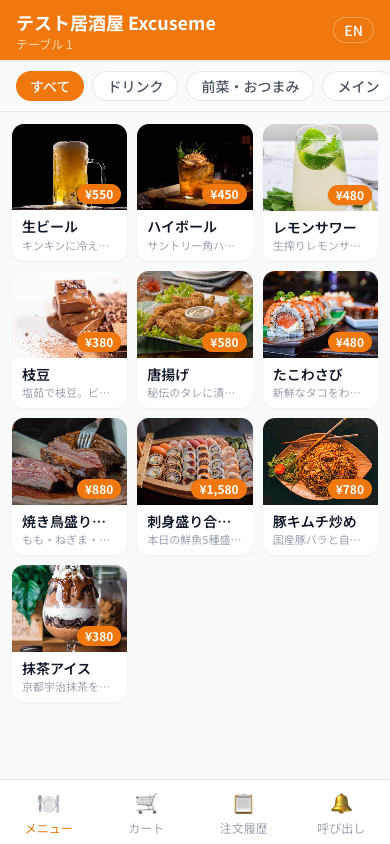
Scan the QR code on the table with your phone camera. No app download needed — the menu opens directly in your browser.
 🔍 Click to zoom
Tap a menu item, select variants (size, preparation style), and add to cart. A reminder appears if items sit in cart for over 3 minutes.
 🔍 Click to zoom
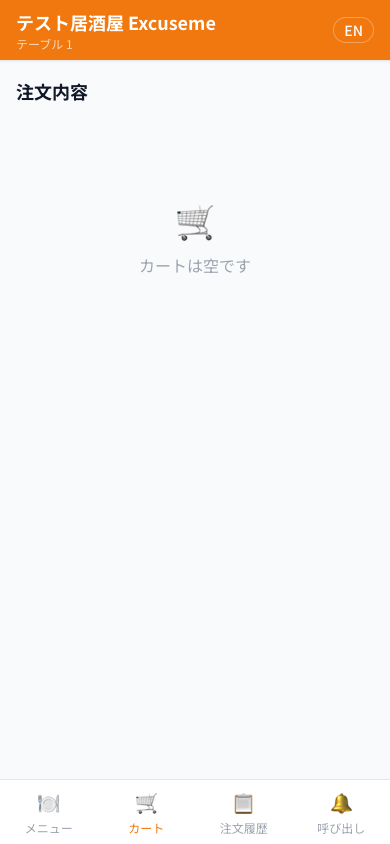
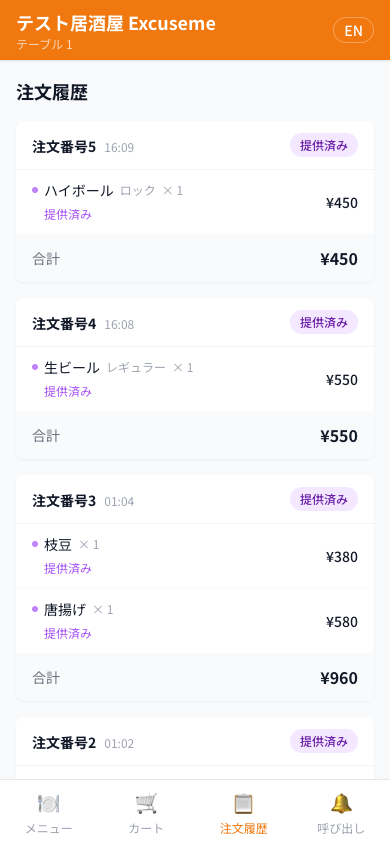
Tap "Place Order" in cart. Your order is sent to the kitchen. Track each item's status (Cooking → Ready → Served) in real-time from the orders tab.
Call staff with one tap. Select "Bill" to send a request — the menu screen locks automatically.
 🔍 Click to zoom
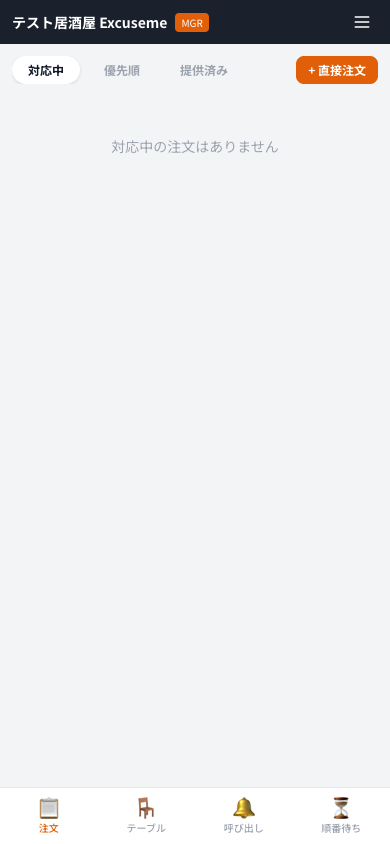
New orders are notified in real-time. "Priority" tab auto-sorts by elapsed time with red alerts after 15 min. Manage each item individually: Cook → Ready → Served.
 🔍 Click to zoom
Toggle table status with one tap. Set all-you-can timers here. Control web reservations with the waitlist ON/OFF toggle.
 🔍 Click to zoom
"Bill" → "💰 Complete" opens the bill modal. Review items, send to POS, select payment method, and confirm. Table auto-moves to cleaning.
 🔍 Click to zoom
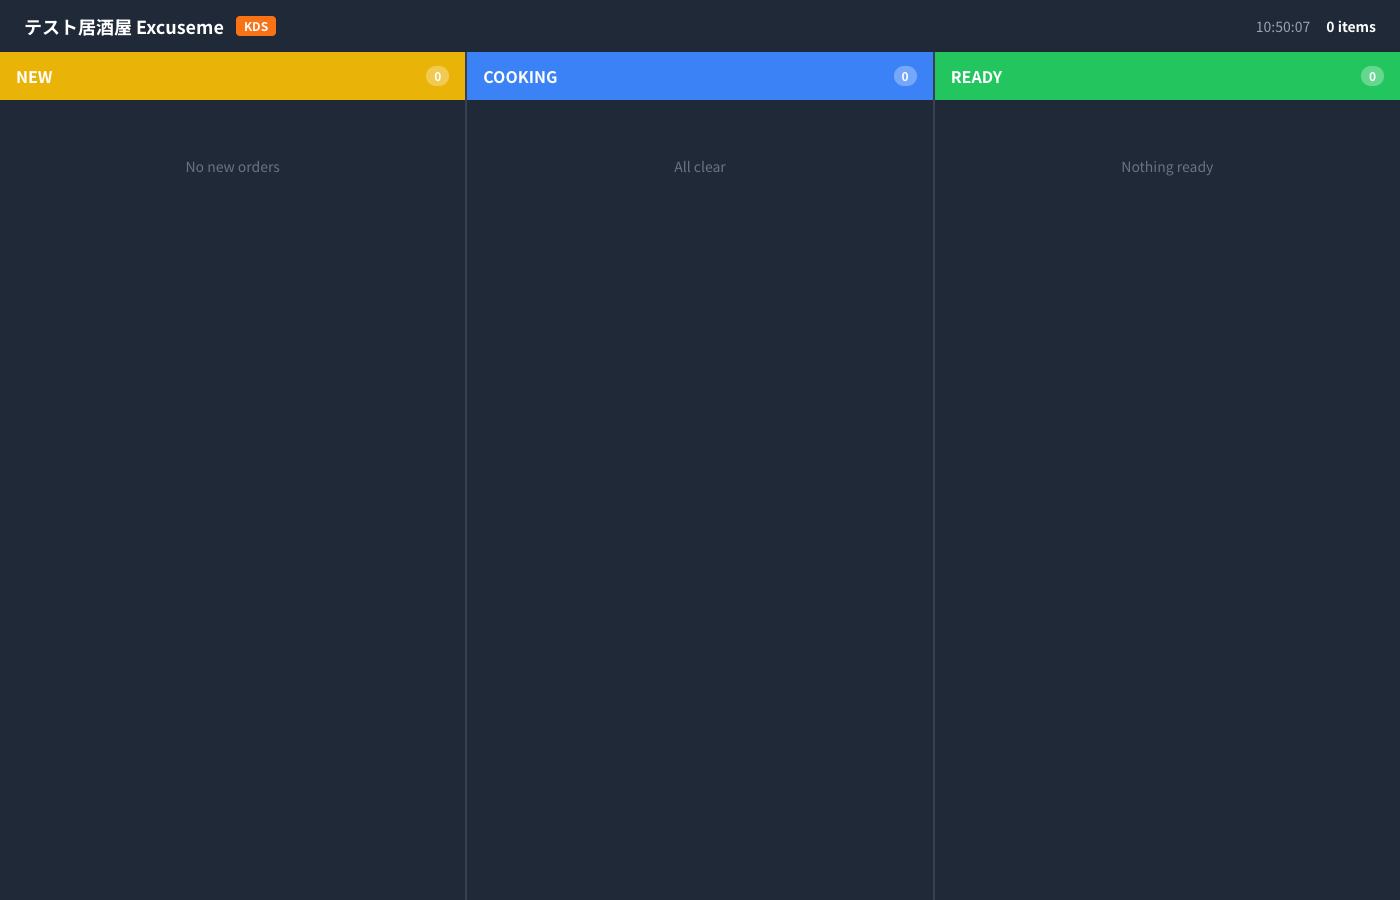
3-column kanban board for the kitchen. Manage orders in NEW → COOKING → READY flow. Red pulsing alerts for delayed items.
 🔍 Click to zoom
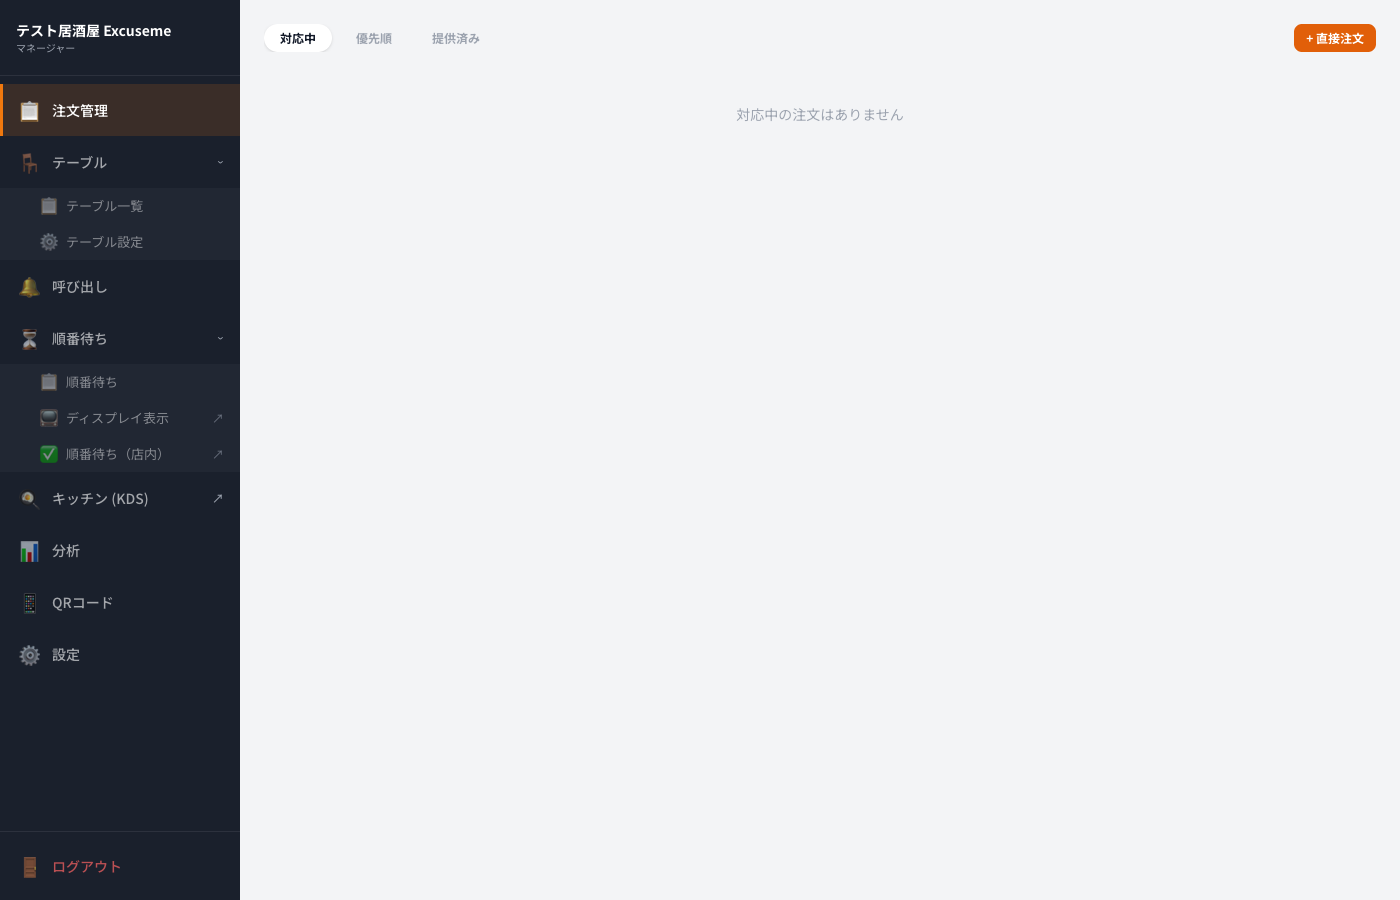
Auto-switches to sidebar layout on PC/tablet. Quick access to orders, tables, calls, waitlist, KDS, analytics, QR codes, and settings.
Customers can register from their phone only when all reservable tables are full. When seats are available, registration is blocked with a "Seats Available" message.
 🔍 Click to zoom
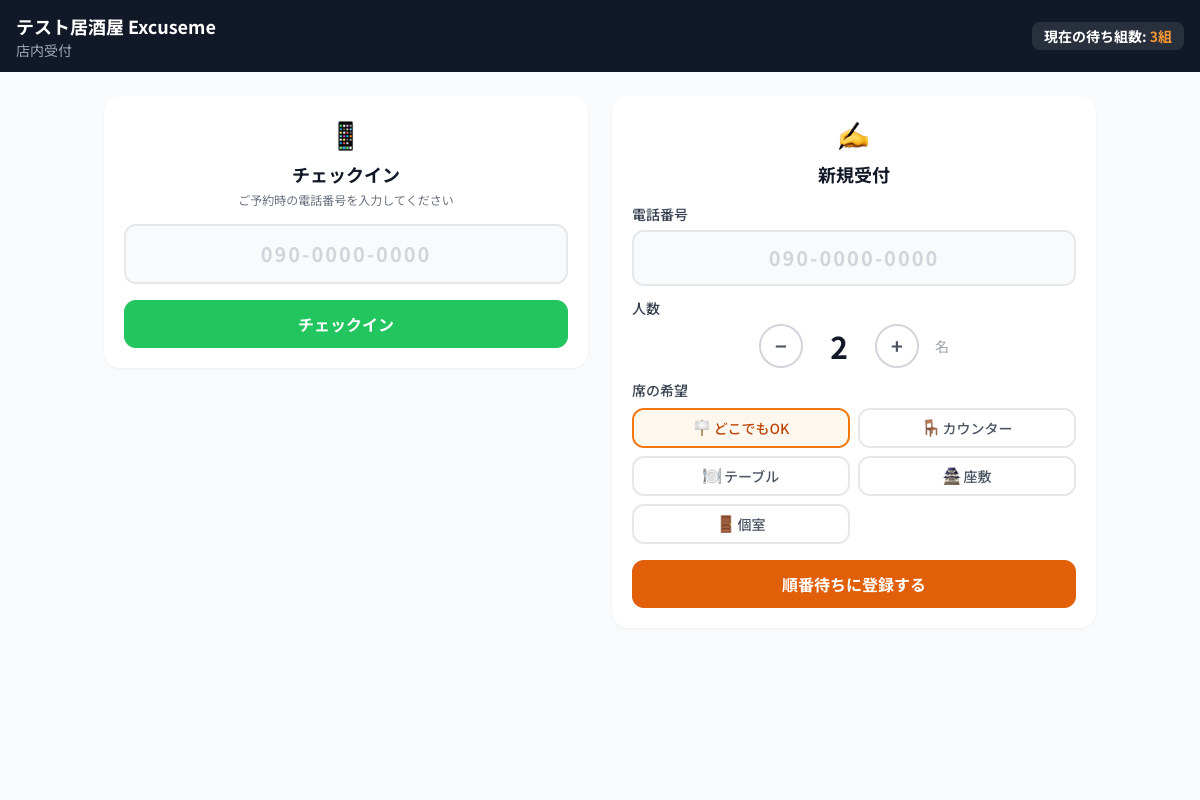
In-store terminal shows both operations side by side. Left: check-in with phone number. Right: walk-in registration (auto checked-in). Custom numpad for easy phone entry.
 🔍 Click to zoom
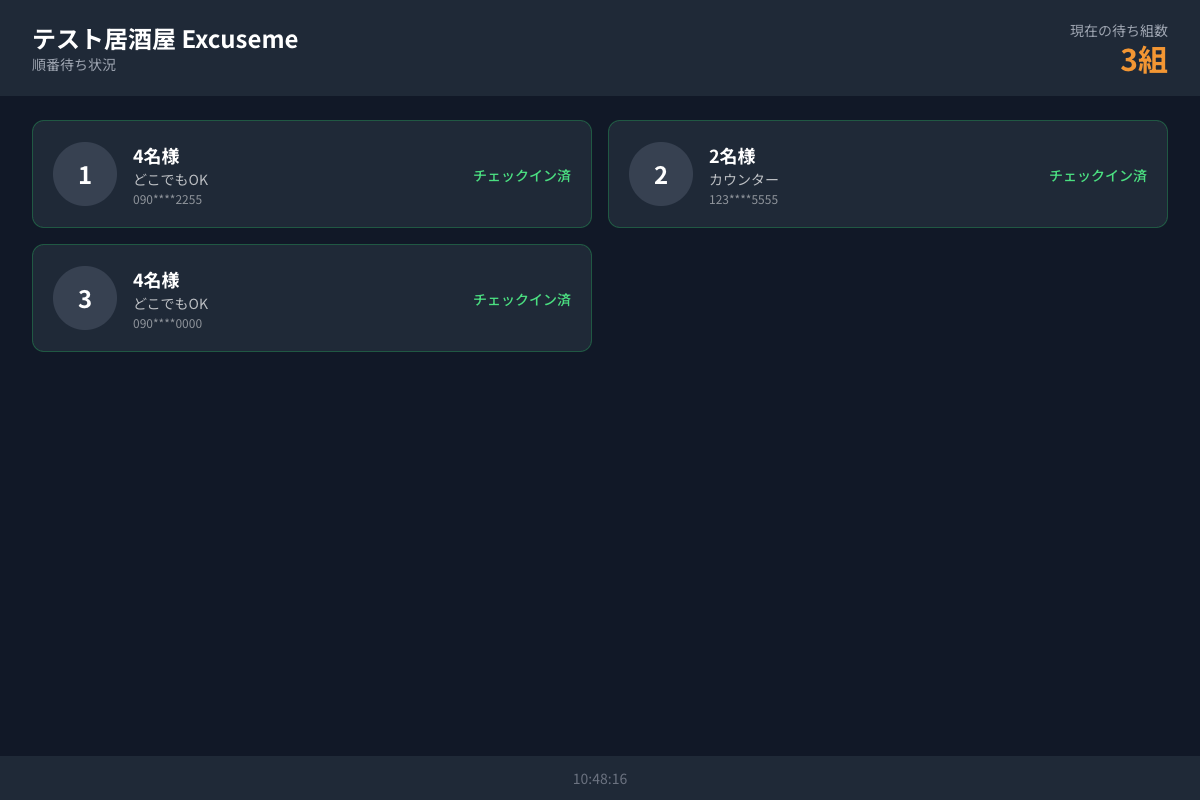
Shows waitlist on an in-store monitor. When calling, displays ticket number, party size, and assigned table with a chime sound.
"Skip" moves no-shows to the back. Late check-ins are re-queued 3 positions behind the front. Early check-ins keep their position. Walk-ins need no check-in.
 🔍 Click to zoom
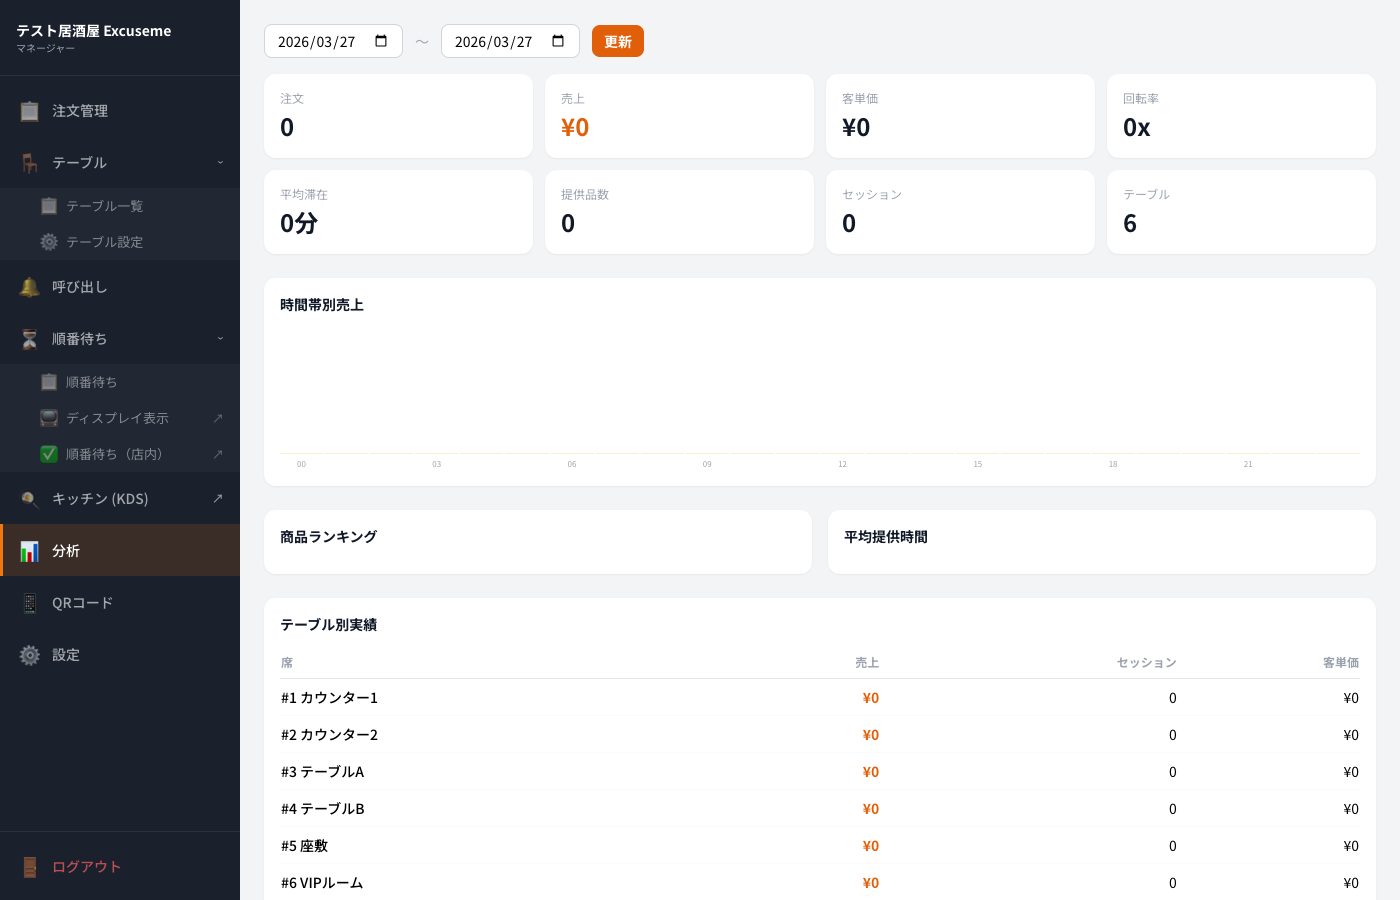
Date range selector for all reports. All data is auto-calculated from order history.
Our support team is here to help.